Date: Oct 12, 2024
Build Linux Based OS from Scratch
Introduction
In this guide, I will walk you through the steps to compile the Linux kernel from source on a Fedora machine. Compiling the kernel gives you the flexibility to customize it for your needs.
Prerequisites
Any resource for this project can be found at Linux Kernel Build
Before we start compiling, you need to have a few tools installed. I will be using Fedora.
1. Install Build Tools
These tools include compilers and utilities needed to build the kernel:
- GCC (C compiler)
- G++ (C++ compiler)
- Make (Automation tool for builds)
- Autoconf, Automake, Libtool (Tools for building software)
- pkg-config (Helps manage library dependencies)
To install all the required tools, run this command in the terminal:
sudo dnf install @development-tools, ncurses-devel
This will install all the necessary development tools in one go.
Note: I will be using Fedora, but you can use any Linux distro. However, some of the commands will be different.
2. Download the Kernel
First, you need to download the latest Linux kernel. We'll be using the official website for this.
- Go to kernel.org and download the latest stable kernel version.
- For convenience, I’ll use the terminal to download it directly. To do so, run the following command in the terminal:
wget https://cdn.kernel.org/pub/linux/kernel/v6.x/linux-6.11.2.tar.xz
Make sure to download the latest stable version available on the website. This guide will be using the
latest release at this time which is version 6.11.2.
3. Organize the Files
Now that you’ve downloaded the kernel, let’s organize the files structure.
- Create a new directory in your home folder where we will keep everything. I will name my directory
meuxos(since I will be calling my distromeuxos):
cd ~
mkdir meuxos && cd meuxos
- Move the downloaded kernel file into the newly created directory. You can check if it’s there by
running
ls:
You should see the linux-6.11.2.tar.xz file in the list. Mine looks like
the following:

4. Extract the Kernel
Once the kernel file is in place, it's time to extract it. We’ll use the tar command to do this, run the following command in the terminal:
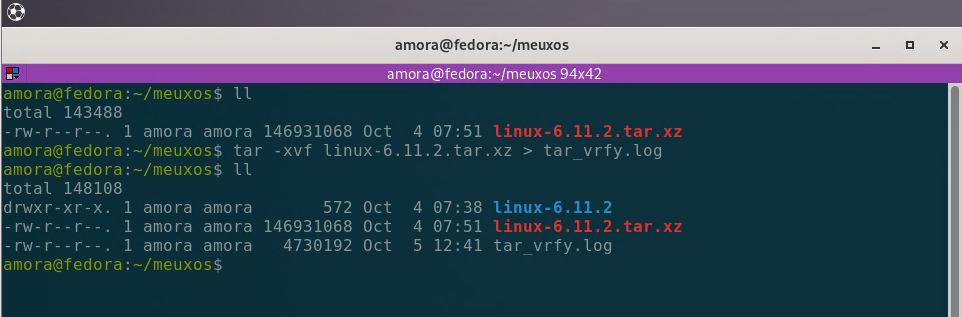
tar -xvf linux-6.11.2.tar.xz > tar_vrfy.log
This will extract the kernel and redirect the file verification log to tar_vrfy.log. It’s a good idea to keep this log in case there are any
issues during extraction.
After the extraction process is completed, our directory structure will look like the following:
5. Configure the Kernel
Once the extraction is done, it's time to start the configuration process. This is a critical step where we will decide the kernel settings.
Now let’s navigate into the kernel directory, to do so execute the following command:
cd linux-6.11.2/
Once we are in the main source directory, it’s time to start the configuration process. To begin the
configuration process, we’ll use the make menuconfig command. This will
open up a text-based user interface for configuring the kernel. So let’s run the following command:
make menuconfig
Once you execute this, you’ll be greeted with a terminal-based configuration menu that looks something like this:
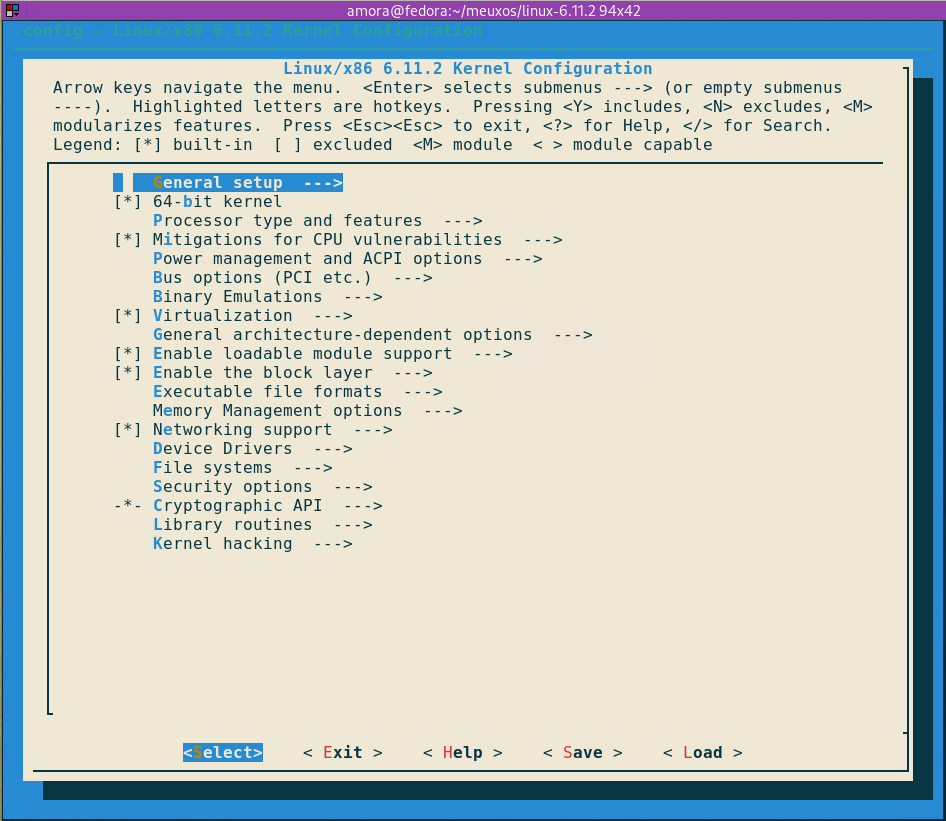
I know, it seems overwhelming just to look at it, but trust me, it's not that complicated. Here’s a breakdown of what you need to know and what we will be focusing on:
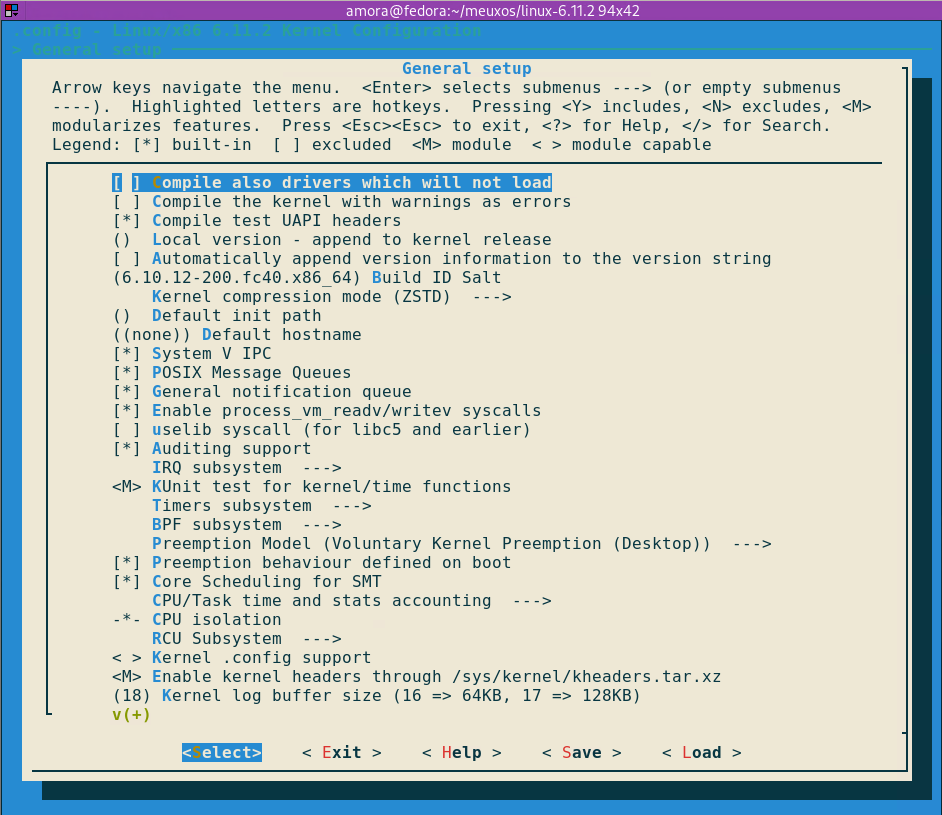
General Setup
From the General Setup, we need to enable the following:
- Enable
initrd - Initial RAM Disk - Set the default hostname to
meuxos
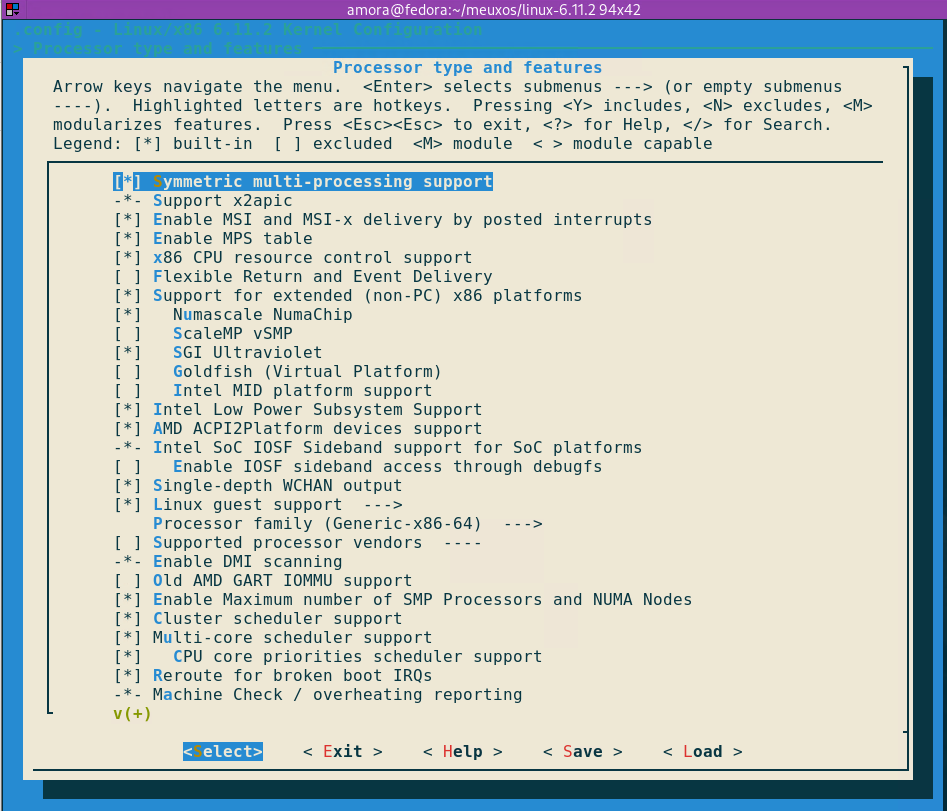
Processor Type and Features
Here we will configure the following settings:
- Make sure that support for x86 architecture is enabled.
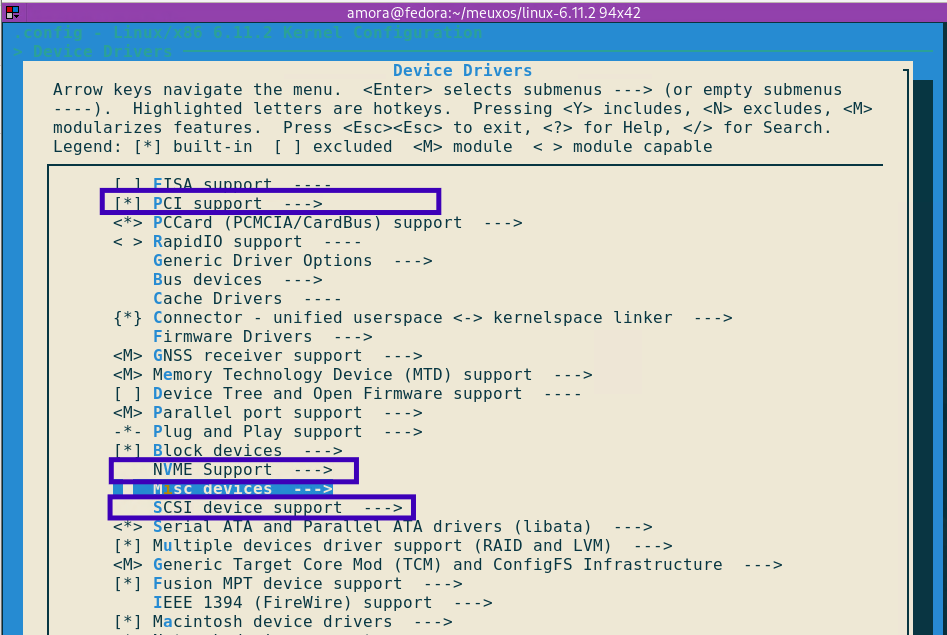
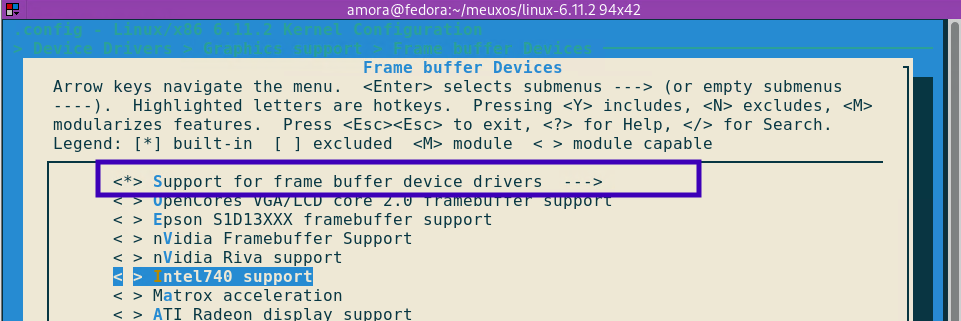
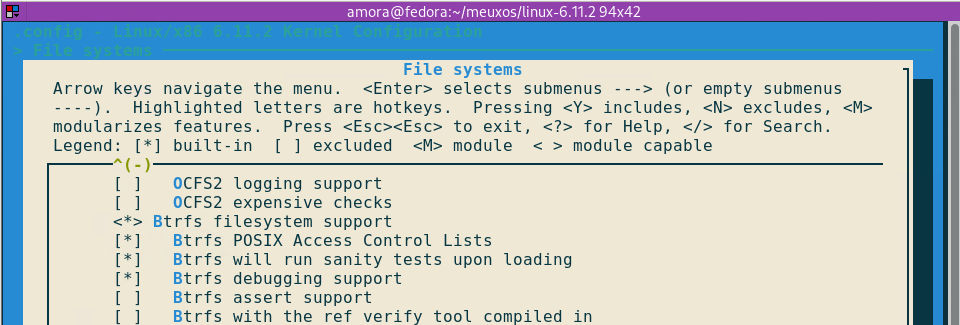
Device Drivers
This is where we select which hardware drivers will be prebuilt with our kernel. Ensure that the following are enabled:
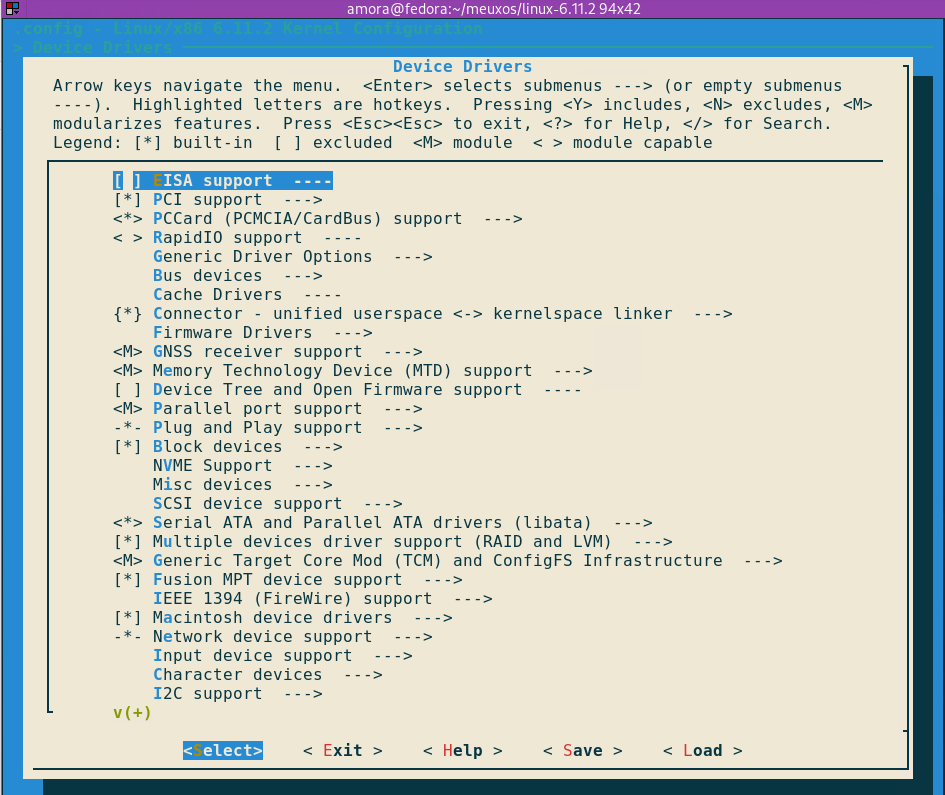
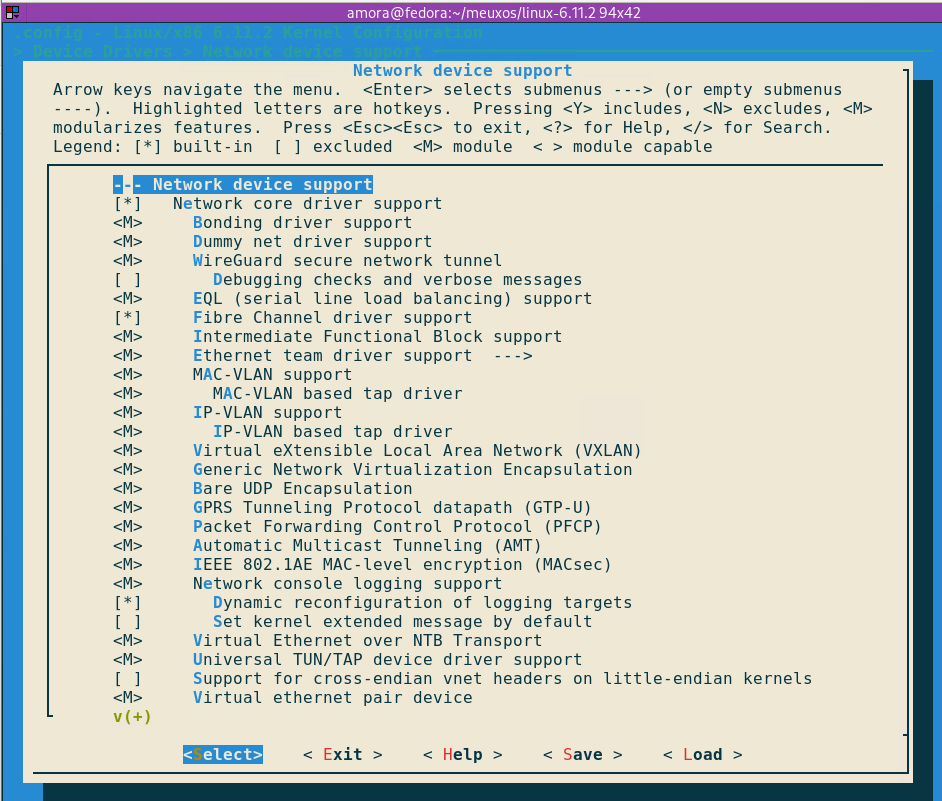
- Enable support for network drivers.
- Enable graphics support and framebuffer device.
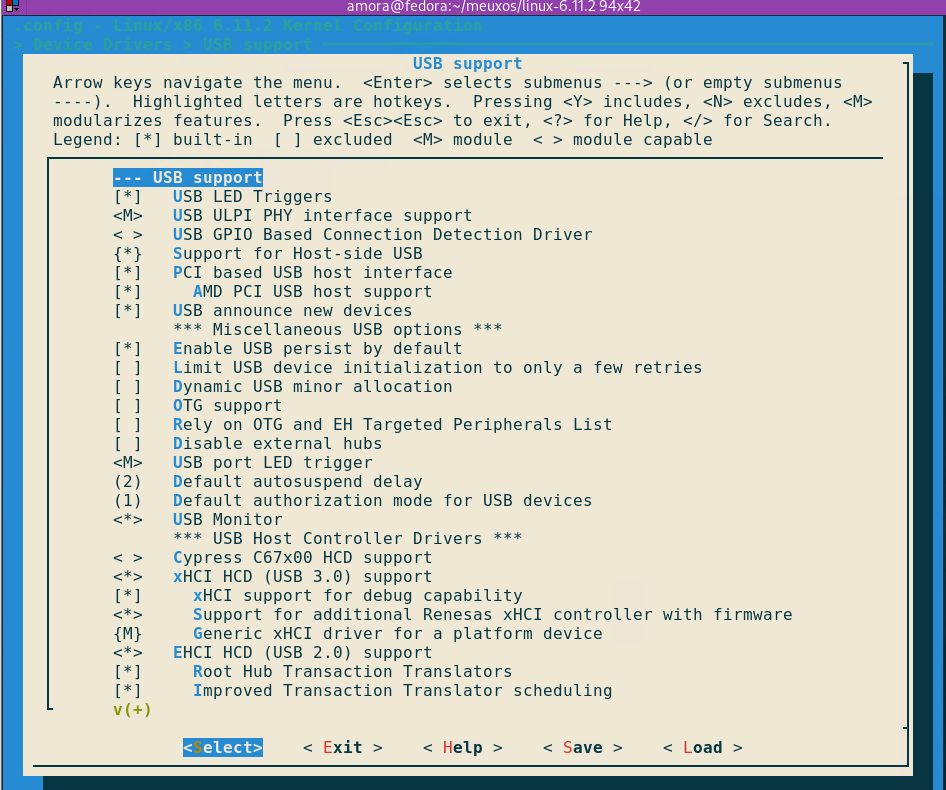
- Enable USB support.
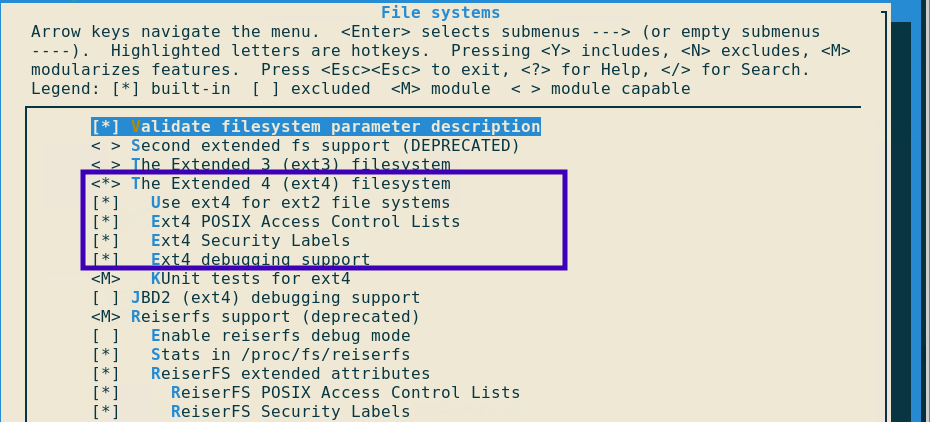
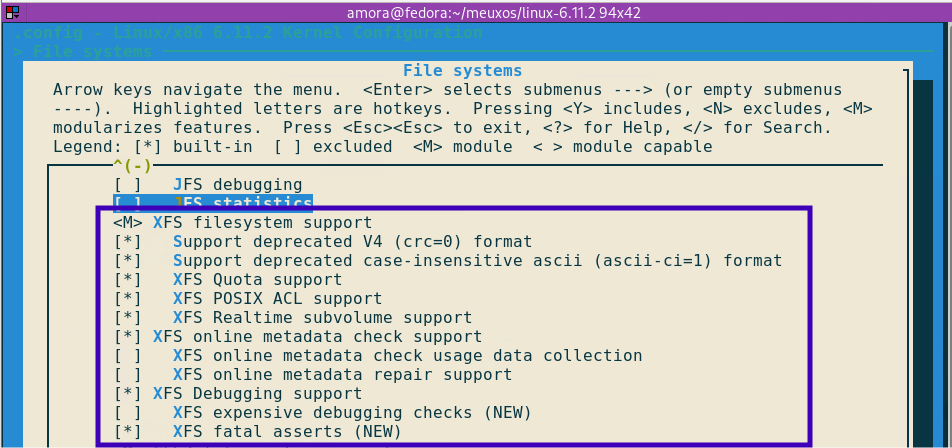
- Enable support for ext4, btrfs, and xfs filesystems.
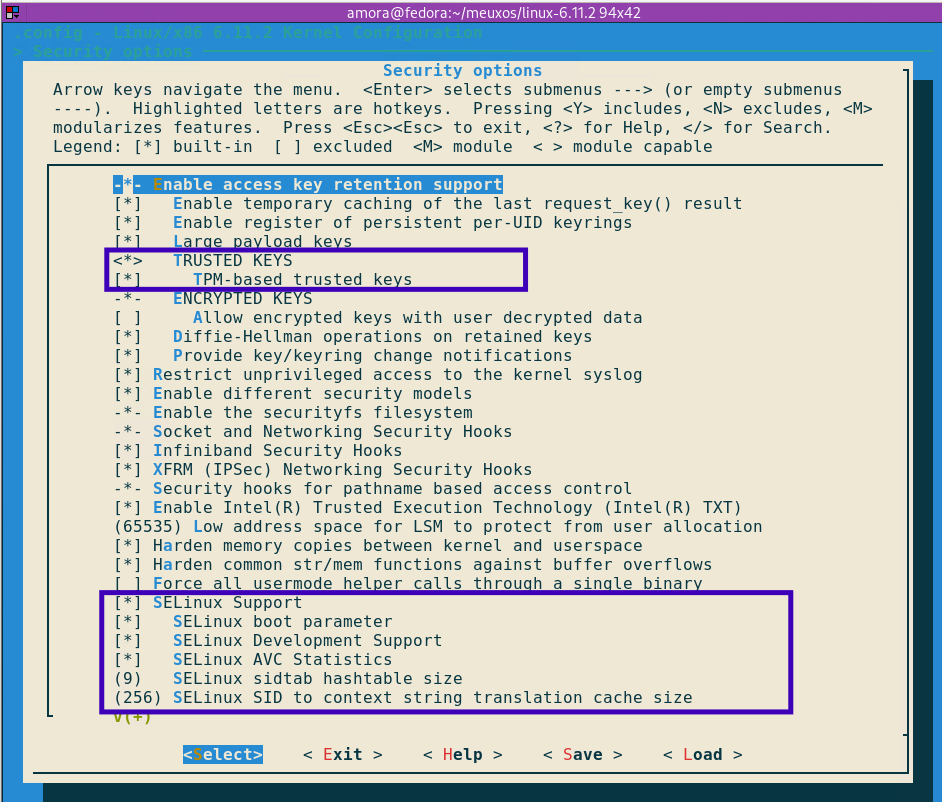
- (Optional) We can enable one last feature and that is `Security options`, for advance security. Here, make sure the support for `TPM` is enabled, without it we won't be able to encrypt our volume and won't be able to read or decrypt external I/O devices such as the one encrypted by `Windows Bitlocker`.
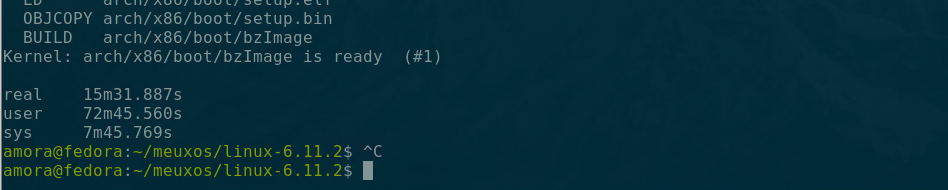
6. Compile the Kernel
Now that we’ve successfully configured our kernel, it’s time to start the compilation process. Make sure to use as many cores as possible, as this process will require computing power.
make -j $(nproc) > build_time.log
The compilation time will vary based on your machine’s specifications. For my virtual machine with 6 cores, it took around 15 minutes.
7. Compile GNU Coreutils
The last step before building the ISO file is to add a userland for our kernel. We will use GNU Coreutils for this project.
wget https://ftp.gnu.org/gnu/coreutils/coreutils-9.5.tar.xz
Now, let's extract and configure the coreutils:
tar -xf coreutils-9.5.tar.xz
Then, configure it for our kernel:
./configure --prefix=/home//meuxos/meuxos-root --disable-nls
Compile the utility to generate a root file system:
make -j $(nproc)
Finally, install the coreutils:
make install
8. Build the ISO
Create the full root directory:
mkdir {dev,etc,home,lib,mnt,opt,proc,root,run,sbin,sys,tmp,usr,var,boot}
Copy the kernel image to the boot directory:
cp ../linux-6.11.2/arch/x86_64/boot/bzImage ./boot/
Create the grub.cfg file in the ./boot/grub directory:
set default=0
set timeout=5

menuentry 'meuxos' --class os {
    insmod gzio
    insmod part_msdos
    linux /boot/bzImage
    initrd /boot/initramfs.cpio.gz
}
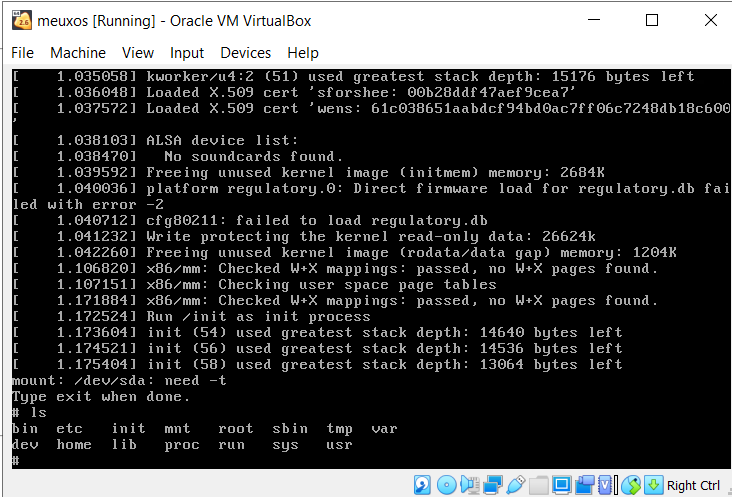
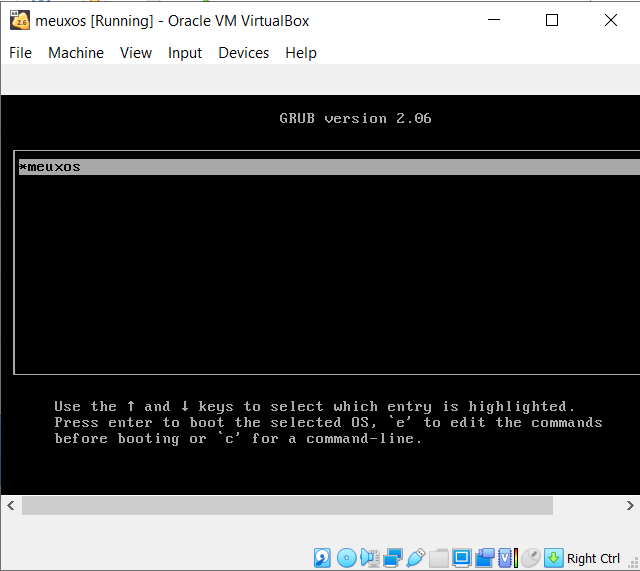
Test using qemu:
qemu-system-x86_64 --kernel ./boot/bzImage --initrd ./boot/initramfs.cpio.gz
Finally, build the ISO:
grub2-mkrescue -o ../meuxos.iso . ./boot/bzImage
Conclusion
Congratulations! 🎉 You have successfully compiled your first Linux kernel.